One of the things I’ve decided to focus on these past few days is to refine the look of the game, and try to develop a unique visual identity. Up until now, pretty much every visual decision has been made based on functional reasons.
Since architecture has been, and still is, a key theme of the game, I thought that would be a good place to start looking for inspiration. Eventually, I came across this post by Thomas Eichhorn about a shader inspired by old architectural drawings. Eichhorn originally wrote it for vvvv, but looking at the image of the final result, I thought this would be a good place for me to start.
I took his image of the final result of the shader, and added a layer of blue highlights to the upward facing surfaces:
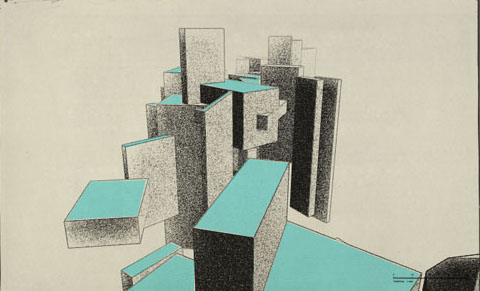
I actually quite like the look. Immediately, it provides a sense of atmosphere, a warm, nostalgic feeling that takes me back to reading illustrated adventure books as a kid. I thought it would be a great style to offset to clinical/sterile nature of the game at the moment. Also, it didn’t look like any other 3D game out there, so this would help in establishing a visual identity.
But first, I had to roll up my sleeves and dive into shader programming.
Edge-Detection
I started off by looking at the edge-detection image effect script that comes packaged with Unity Pro. After a day of being totally confused, with a failed attempt at learning node-based shader programming with Shader Forge, I was eventually able to understand what the script was doing.
There are 5 different modes with Unity’s edge-detection script. For my purposes, the closet one to what I was looking for was “RobertsCrossDepthNormals”, which basically selects one pixel, and then checks to see if the surrounding pixels have similar normals or depth values. If not, then a edge is drawn. However, there were a few problems, namely, it wasn’t able to pick up several important edges.
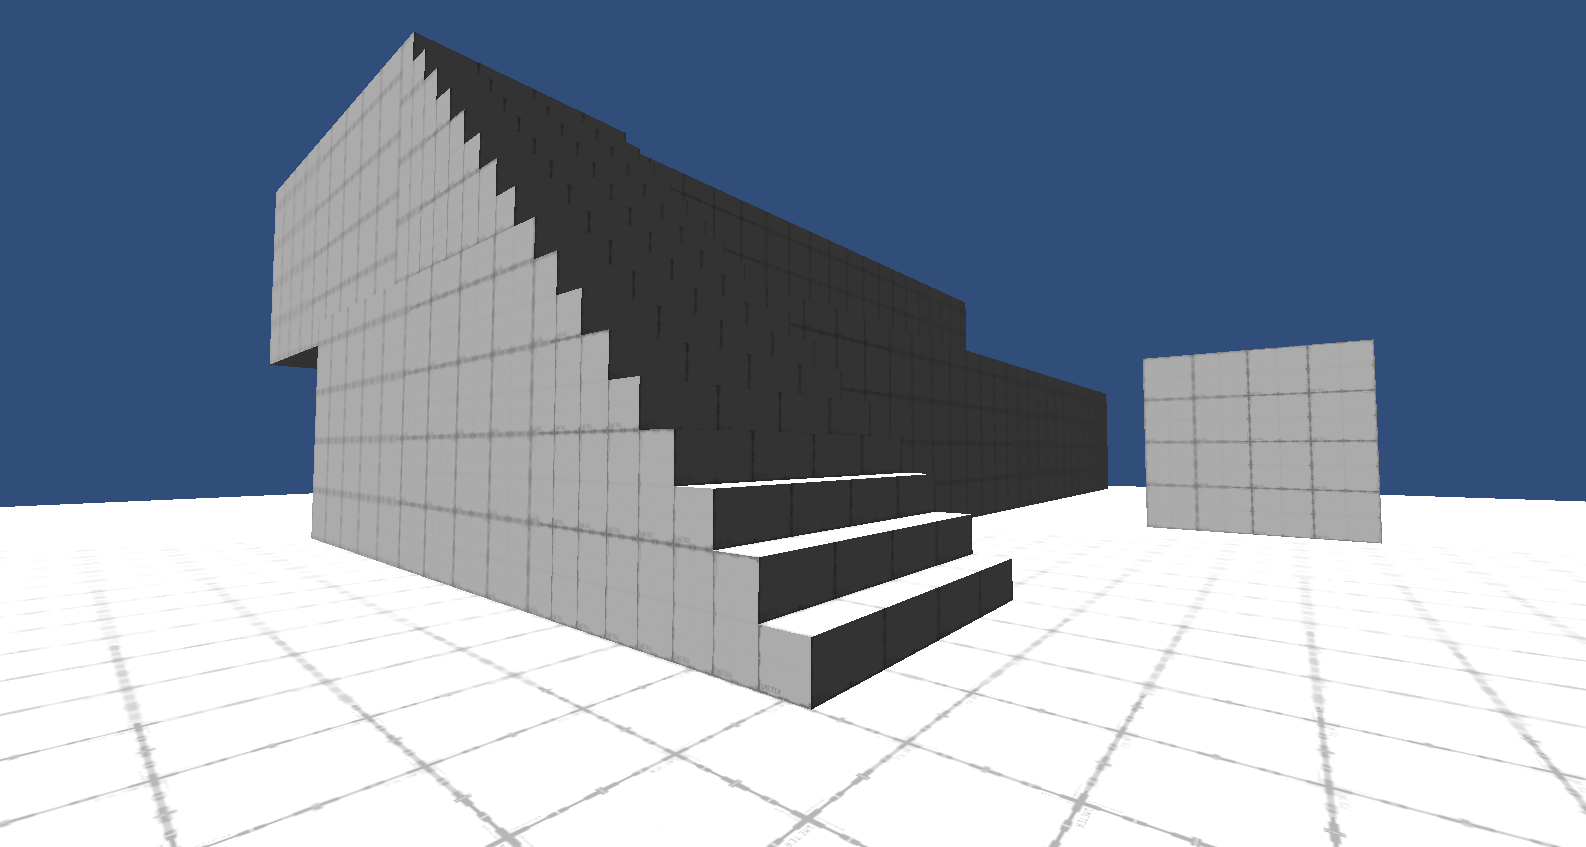
Here’s a shot of a set of stairs, which is pretty common throughout Relativity:
With Unity’s edge detection applied, this is what it looks like: 
So you can see the problem here is that the edges of the steps on higher section of the staircase are getting lost. This is because the algorithm is using both the normals and the scene depth to figure out the line, and in the higher sections, because you’re just seeing the front face of the steps, and not the top face, the normals are all the same.
You can increase the depth sensitivity, which does pick up the edges of the steps higher up, but also ends up with these black artifacts for areas in the distance, where there’s a large change in depth value. You can see the same issue happening on the side of the cube in the middle of the frame:

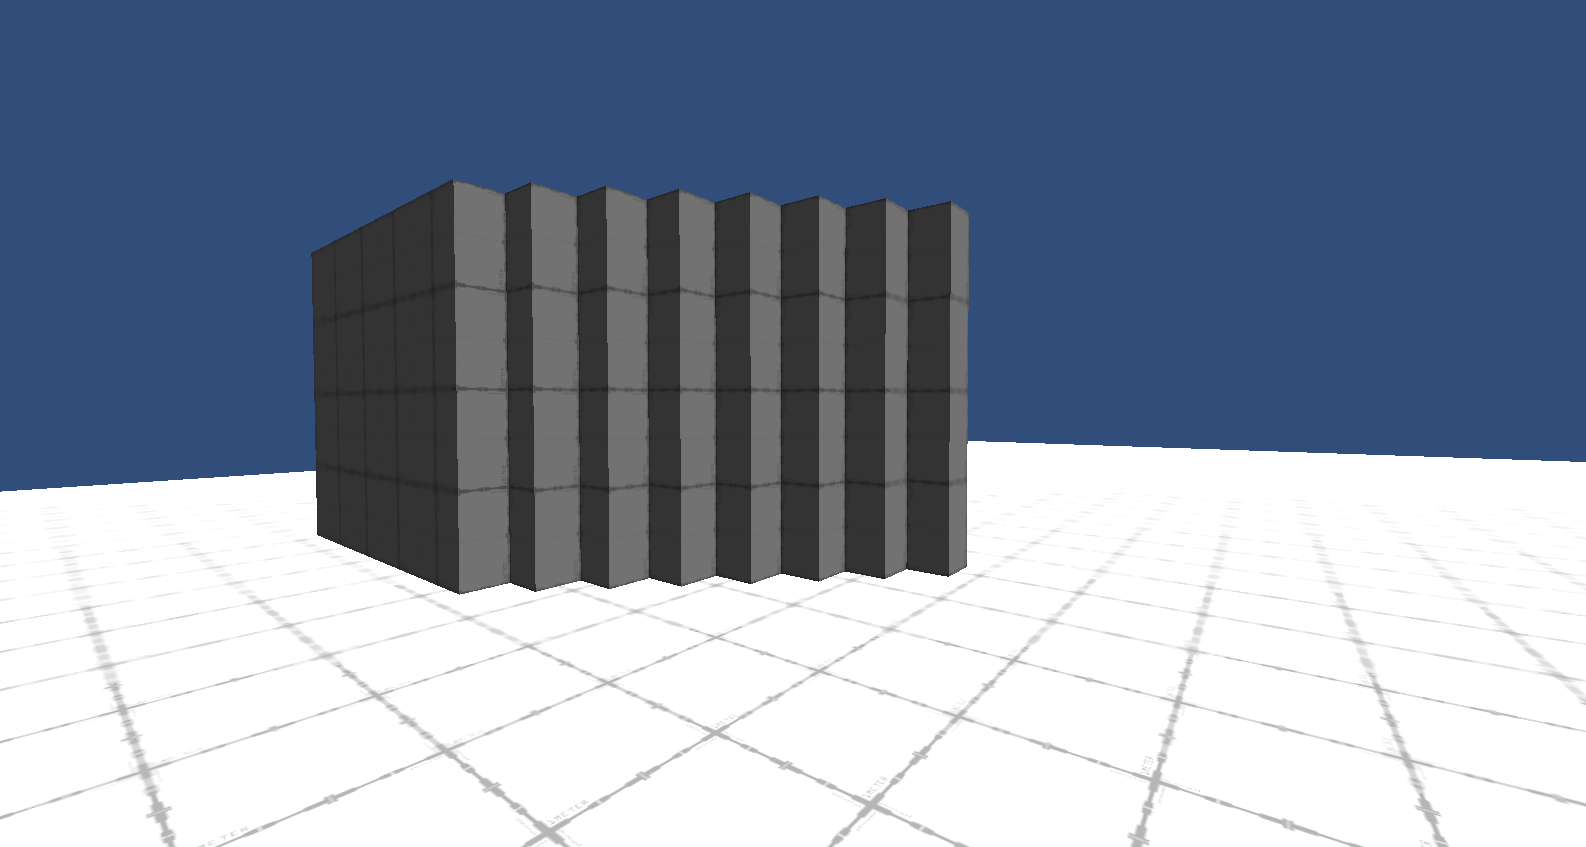
Another problematic area was when I had staircases on the side:
From this angle, Unity’s edge-detection works really well, since you can see very clearly both the front face as well as the top face of the steps:

However, from another angle, the edges disappear completely: 
I decided therefore to create my own edge-detection algorithm, using what Unity has done as a starting ground. The main difference is that instead of checking to comparing to see whether both the normals and depth values are similar, I break it into two steps.
First, I do a check comparing only the normal values of surrounding pixesl. The selection of pixels is actually from the original Unity script. Basically, if the pixel we are examining at the moment is “A”, then compare the normal value of the pixel “B” vs “E” and then “C” vs “D”.
![]()
The reason why I start with normals first is that, in my case, there are no false positives. In other words, when you’re only using normals to do edge-detection, you will only miss edges, you won’t pick up wrong edges. Of course, this wouldn’t work if you had curved surfaces, but for me, since all the angles in Relativity are 90 degree angles, and everything is made up of boxes, this was no problem.
So I draw a first set of edges that pass the normal test.
For the second step, I then take everything else, and run it through a depth test. This time, I add up the depth values of pixels “B”, “C”, “D”, and “E”, then divide by 4, getting a value for the average depth value for the surrounding pixels. I then subtract this value from the depth value of pixel “A”, and if the difference is greater than 0.001, then it’s determined to be an edge.
In the following images, the blue lines are edges drawn in the first round by comparing normals, and the red lines are edges drawn in the second round by comparing depth values. 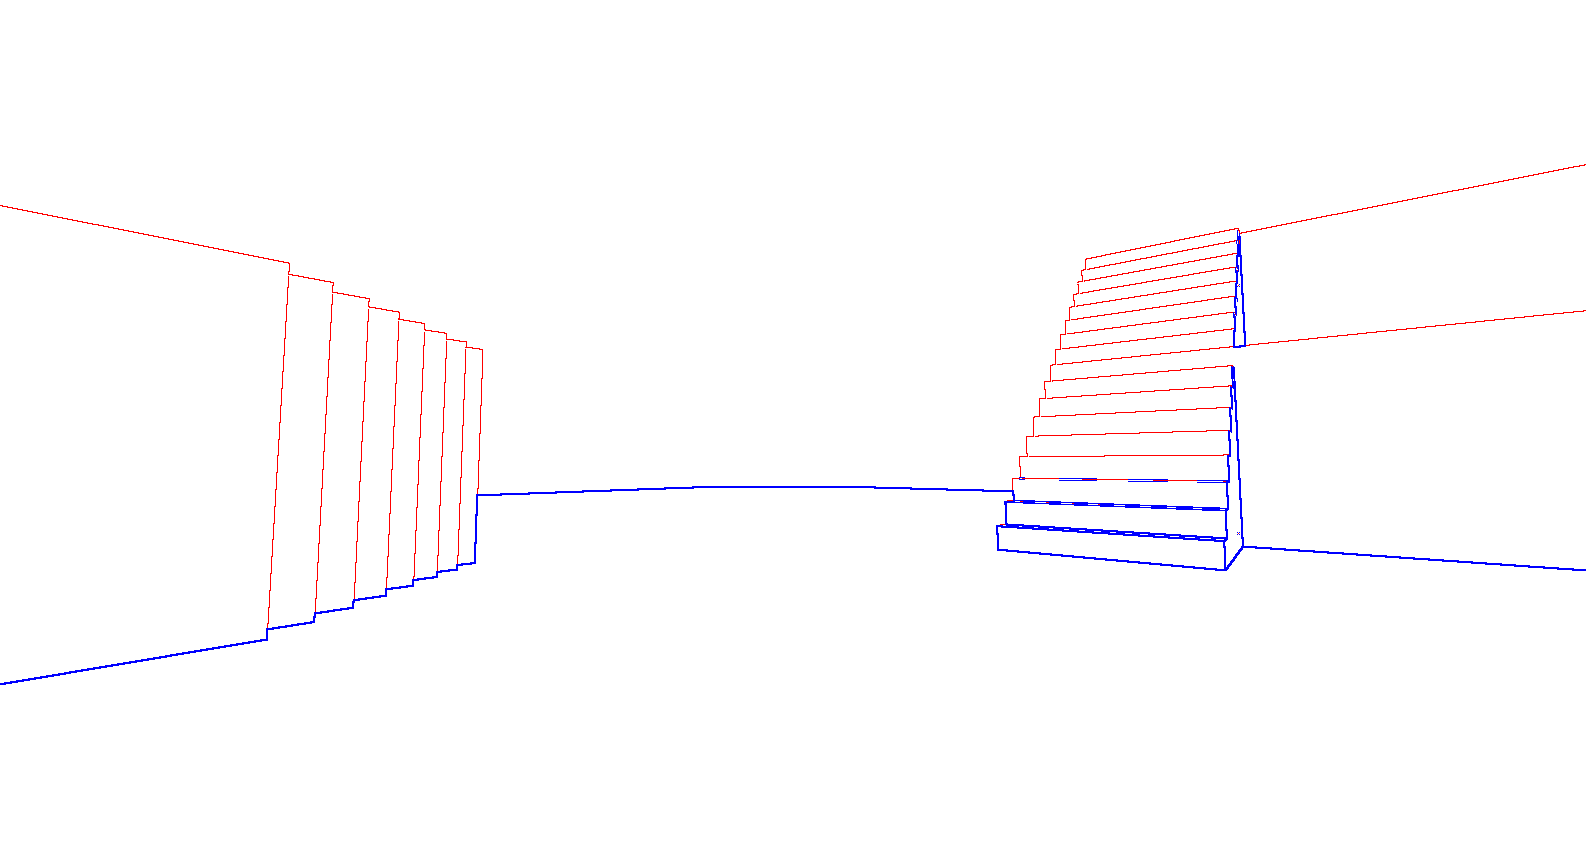

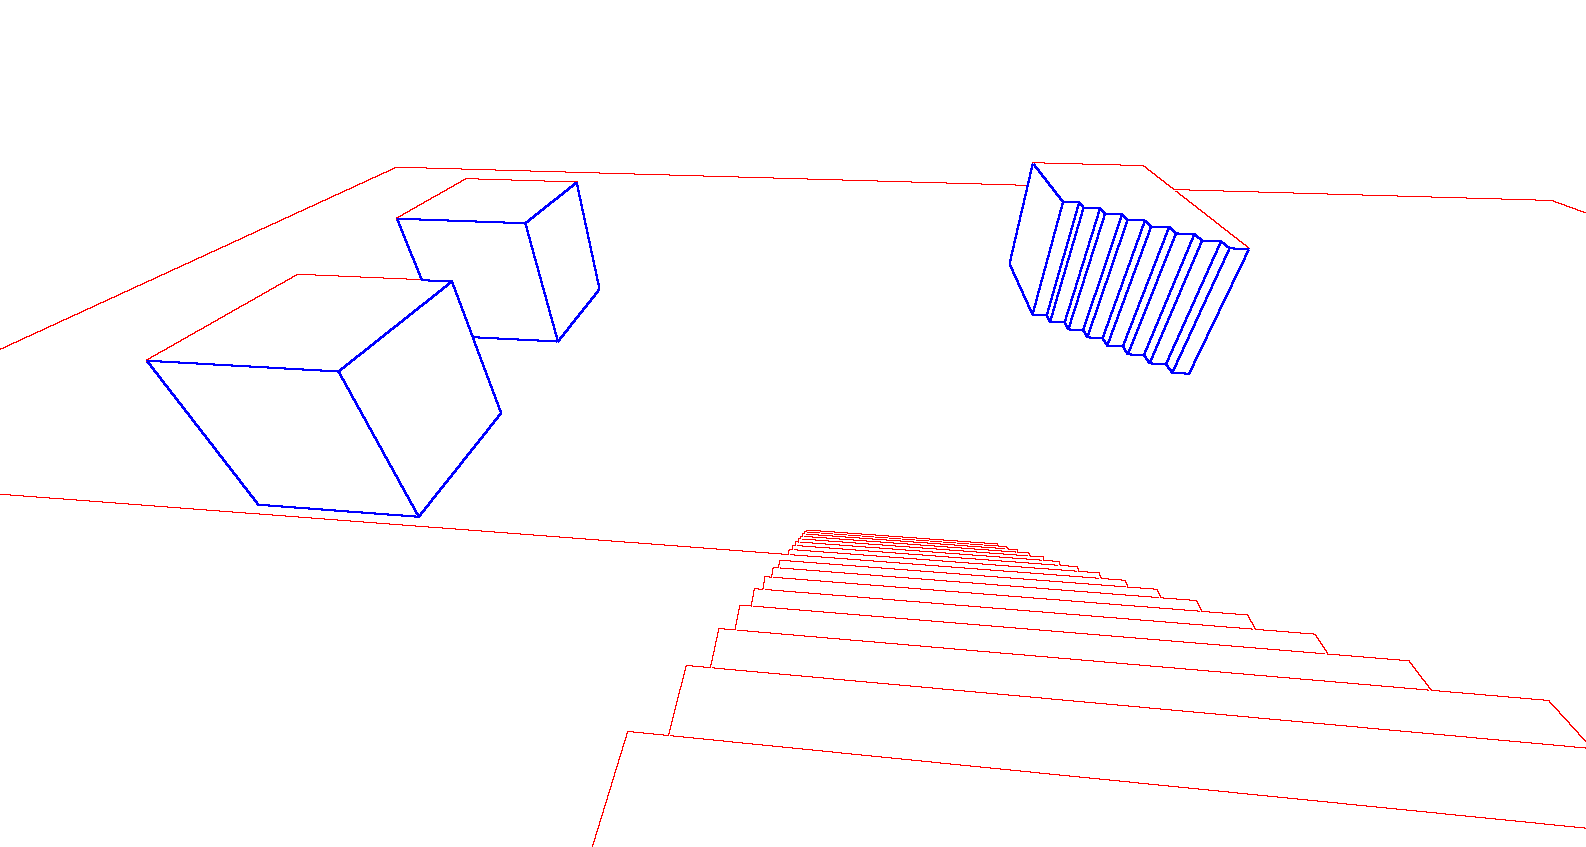
You can see that where the normal test misses the edges, the depth test is able to catch them. And the sensitivity at which the depth test is set allows me to pick up the edges, while not getting any of the weird artifacts from the default Unity shader.
Here’s what it looks like with all black lines: 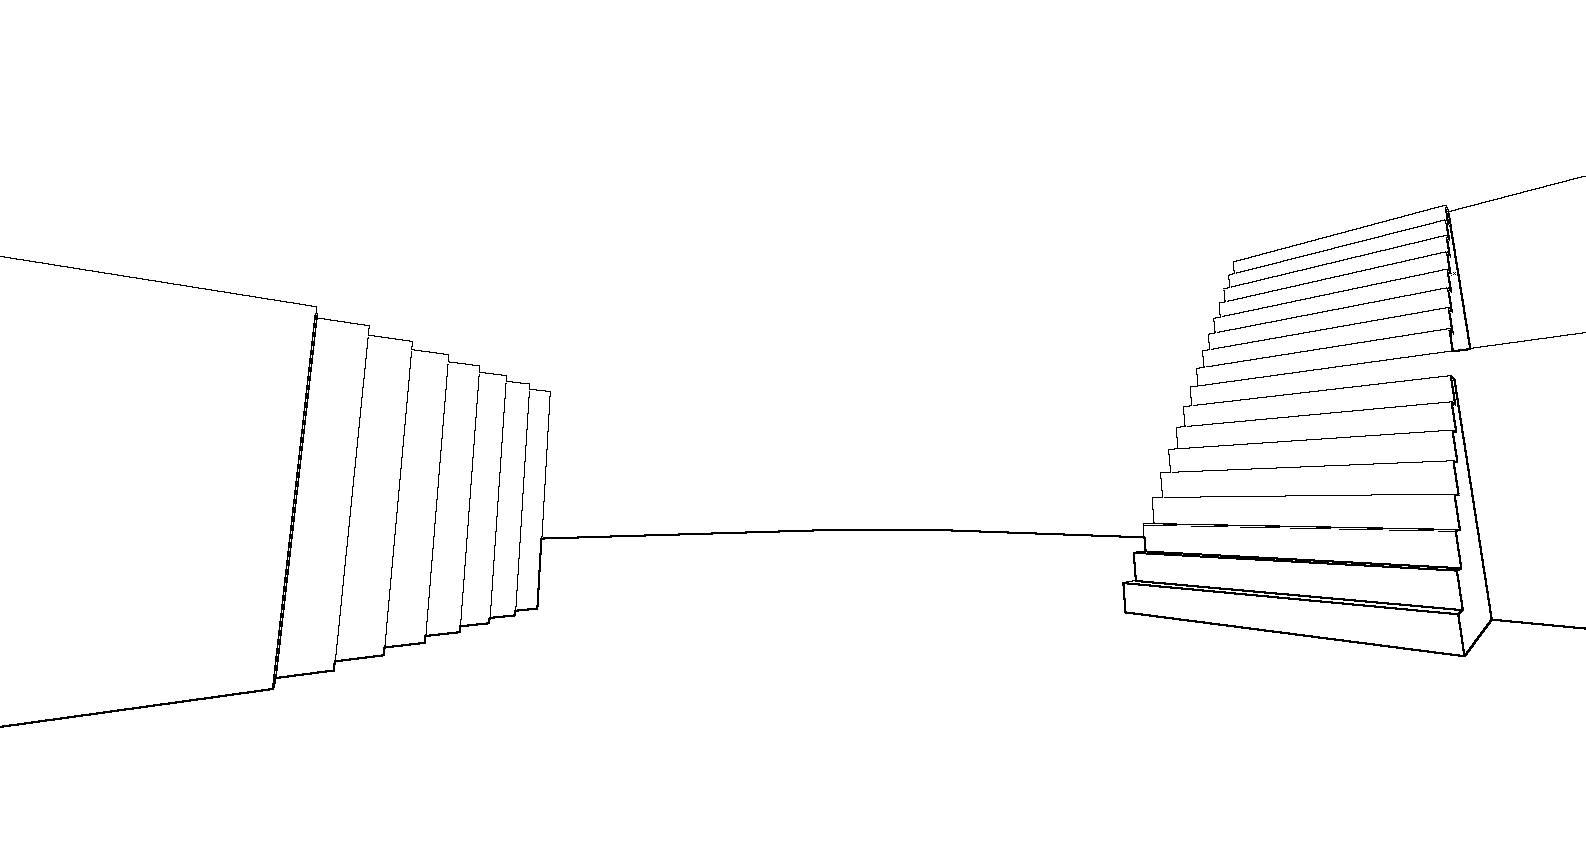
Of course, there’s still some issues, such as the normal lines being thicker than the depth lines, and I still need to fade out the lines in the distance to help with player depth perception. But overall, I think it’s a pretty good start, especially since considering yesterday morning, I had no idea even how to approach this.
One Comment
Hi @WilliamChyr
I want to know if you are willing to share this shader, I need to take some functions.