
I’m finally back in Chicago after quite a bit of traveling. Tokyo Game Show last week was a blast! I’m still trying to process everything, but here’s the post-mortem about my experience while my memory is still fresh.
Application Process
Back in May, I heard the news that Sony was covering the cost of booths in the Indie Game Area (IGA) at the Tokyo Game Show (TGS). It hadn’t actually occurred to me to submit to TGS prior to this. I had known about Sense of Wonder Night (SOWN) as Antichamber was shown there, but didn’t think I could justify the cost of going to Japan.
However, often with these large conventions, the cost of the booth is the most expensive item. This was certainly the case for me at PAX East. So with the Sony sponsorship, I thought, this could actually work, so I decided to submit.
The application deadline for IGA was June 11th. I submitted my application on June 10th.
Sense of Wonder Night is an event that takes place at TGS as well, and is a showcase of 10 games, focusing mostly on experimental titles. It was actually inspired by the Experimental Gameplay Workshop at GDC. The application process for SOWN was separate from that of IGA, and the deadline was about a month later, on July 7th. I also submitted Relativity to that.
Neither IGA nor SOWN required a submission fee, which was really awesome.
Hearing Back
Only July 29th, I got an email from the Indie Game Area organizers saying that Relativity got in! To be honest, I wasn’t really expecting to get in, so had more or less forgotten about the event.
Needless to say, when I got the news, I was not only surprised, but also quite excited and nervous as well. Up until now, I hadn’t seriously considered going to TGS, and I only had 3 days to respond and confirm (I needed to let the organizers know my decision by July 31st).
Right away, I reached out to a few indie devs who I know had been to TGS, and also talked to other Chicago-based indies.
A lot of the feedback was along the lines of:
“Japanese players are not crazy about western-looking titles, and indies games (especially for the PC) don’t do really well there”.
“Don’t expect to make sales while there. You’re not going to meet the same fan base that you would at events like PAX East or PAX Prime”
However, everyone unanimously agreed that it would be a fantastic life experience. And if you’ve seen Alexander Bruce’s talk about the development of Antichamber, you’ll know that going to TGS and Japan in general was one of the most profound experiences for him as a developer.
I went back and forth on whether I should go or not, and ultimately decided I would. Here were my reasons:
- For me, development of the game is about the journey behind it, as much as it is about the game itself. To this end, I want to experience all the opportunities that are available to me. I’m not doing this just to make a game – I also want to meet passionate people, go places I wouldn’t have gone before, and grow as a person.
- I’m still pretty far from release, so I’m not looking to make sales at the moment. My main priority is still to get feedback on design. TGS would be a great opportunity to receive feedback from players coming from a totally different cultural background, and who have likely never heard of or seen the game before.
- I had originally planned to save up to exhibit at PAX Prime. However, when talking to a fellow indie dev, he pointed out that showing at similar conventions may not give you the same return each time. I’ve already shown at PAX East, and while PAX Prime is an opportunity to meet new fans, the demographic of the two conventions is quite similar. From a playtesting standpoint, I’ll probably see a lot of similar people at PAX Prime as I did at PAX East, so may not necessarily gain new insight based on players’ backgrounds.
- Another event I had been considering going to at the same time was Fantastic Arcade in Austin. I had submitted my game to that, and didn’t get in, but was thinking I would still go to meet other indie devs and get feedback on my game from them. However, as was pointed out to me, a lot of these devs I am very likely to meet at the other North American conventions, like GDC and IndieCade. And really, I can get feedback from North American indies anytime I want. At TGS though, I am much more likely to meet people who I would never meet otherwise.
- The life experience – While I’ve traveled to Japan twice prior to my TGS trip, neither were for work. This seemed like it would be a fantastic way to see a side of Japan that isn’t a cookie cutter experience. Plus, as a game developer, going to Japan for a video game convention seems like such a cool experience. It’s the mecca! It’s not very often I get to travel overseas for work, so I didn’t want to look back and regret not taking this opportunity to experience something new.
Preparation
After I responded to the IGA organizers and confirmed I was going, it was time to get ready. I had about a month and a half before the show began, so there was no time to waste!
Japanese Language
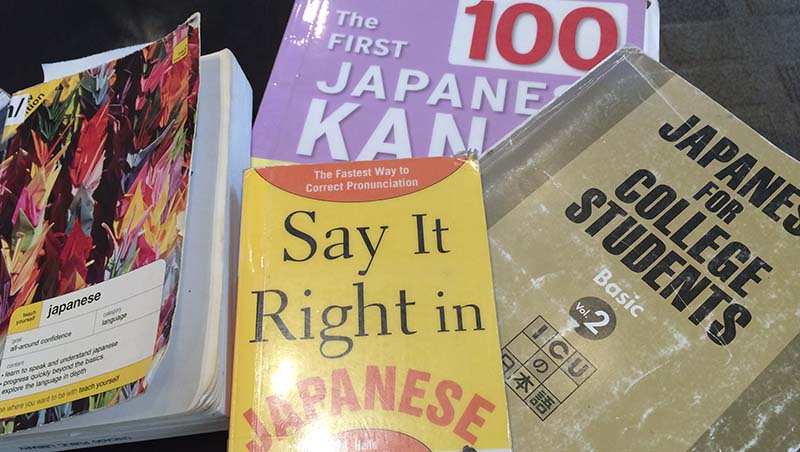
One of the first things I did right away was to go to the library and check out a bunch of Japanese textbooks and audiotapes. I started practicing reading and writing hiragana, and also started listening to the Pimsleur Japanese series – doing one episode a day.
Now, as you probably know already, Japanese is an incredibly difficult language, and it takes people years to master. I wasn’t going to learn how to explain gravity shifting game mechanics in the span of 6 weeks. However, I did learn some basic conversational Japanese, like asking for directions, talking about eating and drinking, and this actually helped quite a bit when I was in Japan.
Poster and Postcards
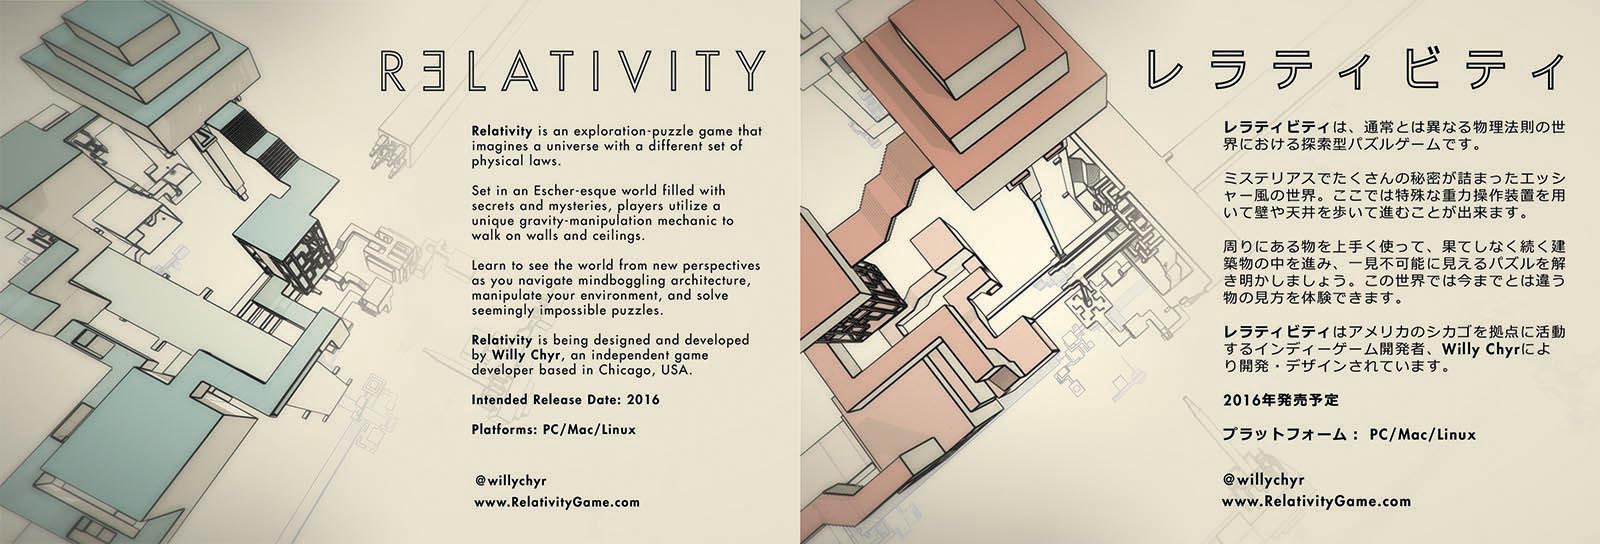
The Tokyo Game Show organizers emailed a PDF manual about what to expect in the Indie Game Area, and what the booth looked like. One of their suggestions was to have a poster.
I figured since I wouldn’t be able to explain the game in Japanese, that I would put some introductory text on the poster to give people an idea of what the game is about, and a bit about myself. That way, if people have any questions, I can just point to the poster.
Here’s the design of the poster:

It turned out I was the only one in the Indie Game Area to do this, and it worked really well! A lot of the booths just had a poster with an image and the game title on it. This would be fine if you were just showing at PAX, but this meant that a lot of Japanese gamers couldn’t tell what your game was about. Likewise, there were several Japanese indies that only had posters with Japanese on it, and I had no idea what their games were about.
I got the same text printed on postcards, with the Japanese text on one side and English on the other. These were also really handy to have at the booth.
Translation
Regarding translation for the English text, I ended up contacting a translator living in Japan based on a friend’s recommendation, and also reached out to Playism, a company that does game localization in Japan. I had actually met someone from Playism on the shuttle ride to the airport during GDC back in March.
I only had about 200 words to translate – including the poster text as well as all the UI in the game, so it was pretty small translation job, and didn’t cost very much.
Once I got the text back, I actually shared my designs on twitter and asked for feedback. Moppin_, a Japanese Indie gave me some really good feedback, and helped me tweak a few sentences to improve the flow of the text.
Phone / Wifi
Like many of you, I now find it very difficult to travel without cell phone plans. Seriously, how did people meet up or find places before cell phones!?
As it turns out, getting a sim card in Japan is actually kind of tricky, as you need a Japanese address to do so. I did some research and decided that a pocket wifi device would be my best option. It’s basically a small device that can receive data, and you just set your phone to get wifi from that.

I ended up going with PuPuRu, which I highly recommend. The cost is about 4 USD a day. On their site they have a map that shows the different areas in which they have coverage. I spent all my time in Tokyo and surrounding areas, and didn’t have any problems.
If you do decide to get this, and want to have it right after you land in Japan, remember you need to book it about a week before you arrive. I had to let them know which flight I was coming in from and send them a copy of my passport. They sent the device in advance to the airport, and I was able to pick it up at the QL counter at Narita when I arrived. This was really convenient, as I was able to look up travel directions right after I landed.
Looking for booth help
As a solo developer, I’m very much used to traveling to conventions and doing everything by myself. However, getting some additional help when exhibiting is always nice.
As an exhibitor in the Indie Game Area, you can get up to 5 passes for free. I reached out to Twitter and asked if there were any indies based in Japan who’d be interested in helping me out for a bit during the show in exchange for a TGS pass.
Through this, I was introduced to Sagar Patel – a Kyoto-based Indie who is originally from Montreal, and who organizes the Kyoto Indie meetup. Sagar then connected me with his friend Alex, who is also based in Kyoto.
The Game
What little time I had outside of working on all the stuff above was spent getting the game’s UI localized in Japanese.

I continued to use OnGUI instead of switching to the newest GUI system in Unity 4.6. Mostly this was because I didn’t want to run the risk of breaking anything, and even though OnGUI is not very efficient, I was at least familiar with it.
I ended up hardcoding all the UI in both Japanese and English. This is not the best localization solution –the preferred method is to have the different languages in an XML file, and just call directly from that.
However, I didn’t really have too much time to implement that, and since I don’t have that much text in the game, I just decided to go with the hacked solution for now.
I do wish I had spent more time on optimization, as frame rate of the game running on my laptop was a bit of an issue.
Travel
September 16th
I arrived in Japan on Tuesday, September 16th, around 5 PM, after a 20 hour trip. My flight was from Chicago to Toronto, with a 6 hour layover, and then a 12 hour flight to Tokyo.

This was actually pretty exhausting as my flight from Chicago was at 6 AM, meaning I had to be at the airport at 4 AM, so I just didn’t get any sleep the night before. On the other hand, I didn’t feel jetlagged at all when I landed.
After I picked up my pocket wifi device, I took the Narita Express train to Tokyo, then transferred to the metro line, and went to Ueno station, near where my hostel was located.
I checked in, and then grabbed a bite to eat at a restaurant nearby.
 My first meal in Japan!
After that, I headed over to Roppongi for Pre-TGS party organized by 8-4, a video game localization based in Tokyo, and they also have apodcast.
The party was really cool – a ton of industry people were there, both locals and people coming in for TGS. I also got to meet a lot of the indies who were going to be exhibiting in the Indie Game Area during the next few days as well.

September 17th
One of the options given to exhibitors is to set up your booth the day before TGS starts. You actually have to let the TGS organizers know that you want to do this by September 10th. I figured since I’m carrying a bunch of things, and would prefer not to panic on the morning of the show, I’d go in earlier to set up.
The Tokyo Game Show takes place at Makuhari Messe convention center, and is actually in Chiba, which is about an hour outside of Tokyo. If you’re leaving from Tokyo Station, you need to take the JR Keiyo Line, and a one-way ticket costs 550 JPY.
This is the layout of Makuhari Messe:
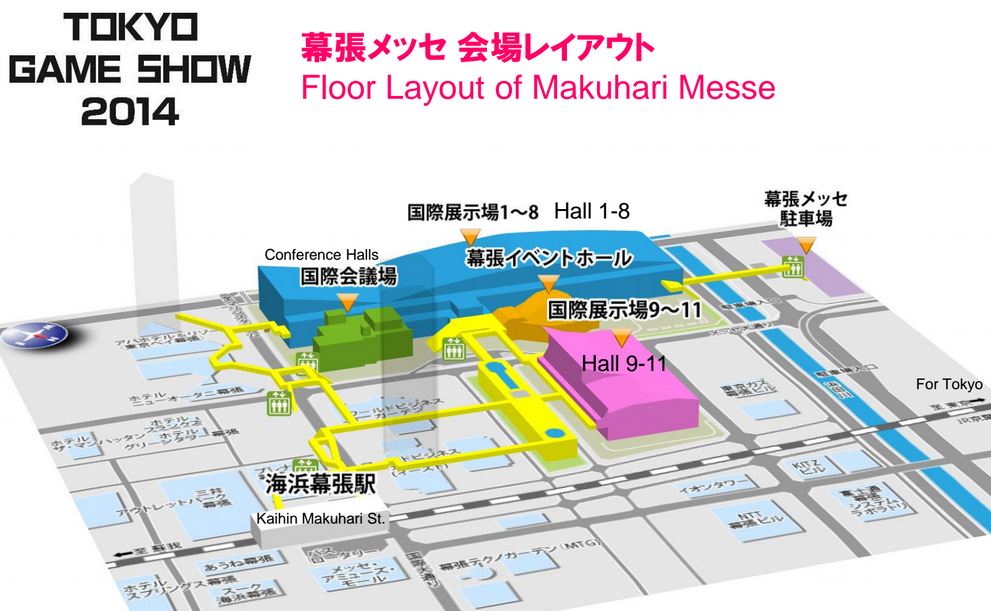
There were 7 halls in total for the expo floor. The Indie Game Area (in pink) was in Hall 3.

And this is the layout inside the Indie Game Area:

I was in booth 84, highlighted in yellow. The booths are organized by alphabetical order. I was in between Wales Interactive and Witch Beam, who were awesome neighbors for the 4 days.
Our location meant that it was really great for exposure, as we were directly across from Square Enix and Capcom. However, we were quite far away from the Indie Lounge area, which was were the benches were, so we couldn’t sit and watch people play our games…
A few things I learned:
- It’s better to rent a 26” TV from the convention center for 10,000 JPY (100 USD) instead of bringing your own monitor. I brought a monitor, and yes, I saved some money, but it is a serious hassle carrying a giant suitcase through the Tokyo train lines during rush hour. There’s also a ton of walking you have to do to transfer between lines, and some of the stations don’t have elevators/escalators. For all the trouble my giant suitcase caused me, I would have gladly paid for the TV. Plus, it was much bigger than my 21” monitor, and you don’t run the risk of accidentally breaking your monitor.
- Don’t use Scotch brand double-sided tape, it doesn’t work very well, and it leaves a mark. I bought some double-sided tape from a convenient store while in Japan, and it worked way better.
- The booth only provided two outlets – this wasn’t enough as I had my laptop, the monitor, speakers, and phone charger. I asked if I could have extra outlets, and soon enough, two workers came and installed them for me. What I didn’t know was that this actually cost 3500 JPY (35 USD), and on the last day, I got a bill unexpectedly.
 If I had known, I would have just gone out and bought an extension cord. Oh well.
It took me about an hour and a half to get set up. Most of the problem was because I was originally using Scotch brand double-sided tape, and it wasn’t very effective, so the poster kept falling off.
Anyway, here’s what my booth looked like once I got it all set up:
