This is Part 1 of a 3 part series on working with depth and normal textures in Unity. Here’s Part 2 and Part 3.
I spent the last three days learning to write shaders in Unity. For the most part, this isn’t a terribly difficult task as there is quite a lot of documentation that goes over the basics. However, when it comes to depth buffers, which are useful for post-process special effects, there’s definitely a shortage of information, and the Unity docs are not super helpful. For example, if you’re trying to understand how depth and normal textures are used, Unity doc’s advice is to “refer to the EdgeDetection image effect in the Shader Replacement example project or SSAO Image Effect.” While this may be sufficient for someone who already has a firm grasp of shaders, this isn’t very helpful for a beginner.
Anyway, after many hours of coding through trial and error, and hunting down rare blog posts and forum discussions concerning the topic, I eventually did figure out how to work with depth and normal textures in Unity. As the learning process was such a frustrating one, I thought it’d be a good idea to write down what I did while my memory is still fresh because:
- in a few months, I will have forgotten what I did and won’t be able to understand my own code.
- In case somebody out there is having the same problem, the information will hopefully be helpful. The few blog posts I found about depth textures were incredibly useful to me, and I was really glad those developers took the time to write things down.
So, here we go.
Inspiration
I had started dabbling with shaders about six months ago. I remember going through a lot of tutorials explaining the graphics pipeline, different kinds of shaders, etc. At the time, I didn’t understand any of it and the topic of shaders just seemed very intimidating. I did manage to get a few things done by starting with an existing shader and tweaking things around until I got kind of what I wanted.
This time around, I wanted to recreate this dimension shifting effect from the game Quantum Conundrum: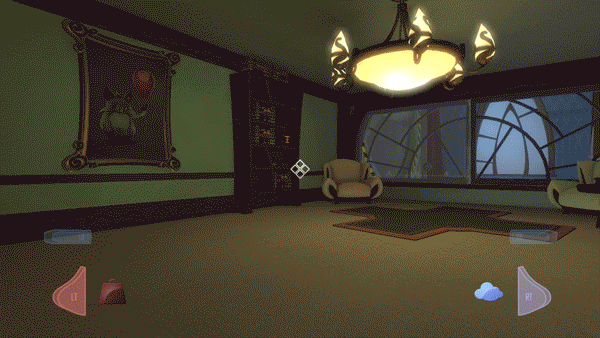
In case you haven’t played Quantum Conundrum yet, I’ll explain what’s going on. Basically, your character has the ability to shift between a number of different dimensions: fluffy dimension, heavy dimension, slow-motion dimension, and reverse-gravity dimension. In each dimension, the shape of the environment and objects are constant, but they have different physical properties. For example, in the fluffy dimension, everything is very lightweight, so you can pick up couches and other items you normally can’t pick up, and in the heavy dimension, everything becomes really heavy, so a cardboard box which normally wouldn’t weigh down a button, becomes heavy enough to do so in the heavy dimension.
In addition to changing properties, the look of everything changes. In fluffy dimension, everything looks like clouds, while in the heavy dimension, everything has a metallic texture to it. In the gif above, the player is shifting from normal dimension to heavy dimension, then to fluffy, back to heavy, and then normal again.
Here’s a still frame of the transition:

A few key things I noticed about this effect:
- The ring of light that passes through the room always starts from whichever object you’re looking at and spreads outwards from there. My guess that it’s a sphere that’s expanding in radius in all direction, since you can see a bit of the ring behind the glass as well.
- The ring of light is superimposed on the environment as well an any objects.
- The ring splits up the textures of the dimensions, so the textures of the new dimensions are not actually put in place until the ring has passed through. This means that at certain points, objects actually have two textures (eg. the painting – look closely and you’ll see the bottom right part of the painting is the heavy dimension painting, while the rest is in the normal dimension).
First Step – Ask for Depth Texture
I had no idea how to approach this effect, and wasn’t even sure where to start looking. After posting the question on some forums and twitter, I was informed that it’s a post-processing effect shader that utilizes the depth buffer to give it that “spatially aware” sense.
I had forgotten most things I learned about shaders at this point, so I started off by going through the basics again. I won’t go into this part too much, except to point you to this explanation of the difference between surface shaders and vertex/fragment shaders, and a list of resources that I found really helpful. This stuff might seem really confusing and intimidating at first, but just read it over a few times and practice writing shaders, and I promise it’ll all make sense eventaully. I do encourage you to at least have a look over these links before you continue reading, especially if you’re still new to shaders.
In Unity, to get the depth buffer, you actually have to use a render texture, which is a special type of texture that’s created and updated in realtime. You can use it to create something like a TV screen that’s showing something happening in one area of your game. The depth buffer, or depth texture, is actually just a render texture that contains values of how far objects in the scene are from the camera. (I should note that render textures are only available in Unity Pro).
So how do you get the depth texture? It turns out you just have to ask for it. First, you need to tell the camera to generate the depth texture, which you can do with Camera.depthTextureMode. Then, to pass it to your shader for processing, you’ll need to use the OnRenderImage function.
Your script, lets call it PostProcessDepthGrayscale.cs will therefore look like this:
1 2 3 4 5 6 7 8 9 10 11 12 13 14 15 16 17 18 19 20 | using UnityEngine; using System.Collections; //so that we can see changes we make without having to run the game [ExecuteInEditMode] public class PostProcessDepthGrayscale : MonoBehaviour { public Material mat; void Start () { camera.depthTextureMode = DepthTextureMode.Depth; } void OnRenderImage (RenderTexture source, RenderTexture destination){ Graphics.Blit(source,destination,mat); //mat is the material which contains the shader //we are passing the destination RenderTexture to } } |
You will then need to attach this script to the camera object.
The Shader
Now, we will create a shader to process the depth texture and display it. It will be a simple vertex and fragment shader. Basically, it will read the depth texture from the camera, then display the depth value at each screen coordinate.
Let’s call the shader DepthGrayscale.shader:
1 2 3 4 5 6 7 8 9 10 11 12 13 14 15 16 17 18 19 20 21 22 23 24 25 26 27 28 29 30 31 32 33 34 35 36 37 38 39 40 41 42 43 44 | Shader "Custom/DepthGrayscale" { SubShader { Tags { "RenderType"="Opaque" } Pass{ CGPROGRAM #pragma vertex vert #pragma fragment frag #include "UnityCG.cginc" sampler2D _CameraDepthTexture; struct v2f { float4 pos : SV_POSITION; float4 scrPos:TEXCOORD1; }; //Vertex Shader v2f vert (appdata_base v){ v2f o; o.pos = mul (UNITY_MATRIX_MVP, v.vertex); o.scrPos=ComputeScreenPos(o.pos); //for some reason, the y position of the depth texture comes out inverted o.scrPos.y = 1 - o.scrPos.y; return o; } //Fragment Shader half4 frag (v2f i) : COLOR{ float depthValue = Linear01Depth (tex2Dproj(_CameraDepthTexture, UNITY_PROJ_COORD(i.scrPos)).r); half4 depth; depth.r = depthValue; depth.g = depthValue; depth.b = depthValue; depth.a = 1; return depth; } ENDCG } } FallBack "Diffuse" } |
So as you can see, it’s a pretty basic vertex and fragment shader. The one thing I want to draw your attention to is line 24:
For some reason, my depth texture kept coming out inverted. I couldn’t find anyone else who had the same problem, and could not figure out what was causing this, so I just inverted the y value as a fix. If you’re finding that your image is inverted vertically with the above script, then you can delete this line.
Now, create a new material, call it DepthGrayscale, and set its shader to “DepthGrayscale” that we just created. Then, set DepthGrayscale as the material variable on the PostProcessDepthGrayscale.cs script that you attached to your camera.
What you should see
You scene should look something like this (obviously with different objects – my scene is just a bunch of boxes spaced out so that you can see the change in color, which is just the depth value):

Also, if your image is coming out like the image below, try lowering the far clipping plane setting on the camera object. It could be that the value is set too high, and so all your objects fall into a small band of the depth spectrum, and therefore all appear black. If you lower the far clipping plane value, then the depth spectrum gets smaller, and the objects would fall along more of a gradient in terms of depth values. I spent quite a long time thinking my code wasn’t working, when it turned out I just had the far clipping plane set too high.

This post is getting to be quite long, so I’m going to stop for now, and continue in Part 2.
Just a quick recap, this is what we’ve done so far:
- Learned to use Camera.depthTextureMode to generate a depth texture.
- Wrote a script to tell the camera to send the rendered image (in this case the depth texture) to a render texture, which is then passed to a shader.
- Wrote a shader to display the depth values as a grayscale scene.
21 Comments
Hi,
I am vishal wakade, I read this Image Effect tutorial, and I am very very thankful to you for taking a time from your busy schedule and writing this tutorial for the beginner like us, as I have did lot of search for tutorial in understanding how image effect work?, what is the depth texture? how to utilize depth texture it? How to use RenderTexture in ImageEffect? etc. but I didn’t get any tutorial on it. Tutorial with some example and good explanation make thing understand clearly for a beginner like me. Now its like secrect behind the magic of Image effect revealed for me. Thanks a lot
Hey Vishal, really glad to hear you found this post helpful. Thanks for letting me know. I was in your shoes when I started learning to work with depth textures, and it was the lack of decent tutorial that inspired me to right the post. It was really frustrating trying to piece things together without any help, so I’m very happy to hear that this information was able to help you out a bit.
Great, tutorial! Thanks
Glad you found this useful!
Hey Willy,
Fantastic job. Btw, when you use:
camera.depthTextureMode = DepthTextureMode.Depth;
Unity actually renders all the objects that the camera can see to a D16_UNORM depth texture, i.e., an entire pass is made.. it doesn’t just “use” the depth buffer after rendering things to the color & depth buffers.
I’m not sure if you’ve messed around with transferring depth buffers b/w cameras.
I’m having trouble in doing that – i posted my question at
http://stackoverflow.com/questions/22696123/unity3d-use-main-cameras-depth-buffer-for-rendering-another-camera-view
Nice work, indeed!
Regarding the “inverted texture” issue, Unity provides enough information, accessible within shaders, to decide whether there is need to invert the V coordinate. In DirectX world, the origin in UV space is top left corner and V increases downwards, while in OpenGL it is the bottom left corner and V increases upwards.
#if defined (UNITY_UV_STARTS_AT_TOP)
// For DirectX-like systems
o.scrPos.y = 1 – o.scrPos.y;
#else
// For OpenGL-like systems
// essentially do nothing, unless you need some specific uv-transform. #endif
Hope this helps! 🙂
Hi,
I just want to save the depth map of the entire scene in an image file.
What should I do?
Thanks 🙂
Great post, really helpful! 🙂 I’ve been thinking about making my own edge detection shader but I’m still a bit of a shader noob.
I don’t know if you’re still using the same base code these days, but seems like you could make your code more simple and efficient by taking out the ComputeScreenPos() and tex2DProj() stuff and using the input uv coordinate directly (since when you do Graphics.Blit(), it draws a full screen quad with the correct uv coordinates already).
Here’s a really simple shader that does this: https://gist.github.com/MattRix/3ecec4325db2712efd7e (note that I’m using DepthNormals instead of Depth, but either will work)
“For some reason, my depth texture kept coming out inverted.”
Ah hah, just discovered that when you switch to Deferred instead of Forward rendering, the buffer will no longer be vertically inverted. I bet when you did this test you were probably in Forward mode, but most other examples you saw were from people using Deferred (or from people on OpenGL platforms).
Very useful!Good Tutorial
Hi William Chyr,
Im a new for Unity and I found this a very good tutorial for beginners. Im very very thankful to you!. You saved my time!
Hi, Willy,
Thanks for your tutorial. Your tutorial is very helpful for me, but I still have one question in dealing with the depth value. Here is my question.
I can get the depth image now, but I need a more precision depth value(not 0~255). I want to save the depth value in the shader file to a .txt file. I had tried to use the RenderTexture to get the value, but the value is wrong. Does it have any method to implement? Thank you very much!
Read so many articles trying to get depth textures to work; thanks to your tutorial, I finally have it working, and in less than 5 minutes. Your suggestion on the far clipping pane was very helpful. Thanks!
Hi Willy,
I follow your instruction but it does not work. I cannot get the depth image. Could you post your scene on through website?
Hi,
Thanks a lot for your tutorial. Although I know how to write a shader, I never worked with depth before. It’s really helpful to have a working example.
Hi,
I’ve checked what Matt Rix wrote and I came up with a solution that works too.
v2f vert (appdata_base v){
v2f o;
o.pos = UnityObjectToClipPos(v.vertex);
o.uv = v.texcoord;
return o;
}
half4 frag (v2f i) : SV_Target {
float depth = Linear01Depth(UNITY_SAMPLE_DEPTH(tex2D(_CameraDepthTexture, i.uv)));
return half4(depth, depth, depth, 1);
}
Thank you for the information. I followed your instruction and used your code however I got following error:
NullReferenceException: Object reference not set to an instance of an object
PostProcessDepthGrayscale.Start () (at Assets/Custom/PostProcessDepthGrayscale.cs:14)
What I did is add component on the camera with PostProcessDepthGrayscale.
And create Material which added your shader code. And set sphere with new material. What I am doing wrong here?
@spk: Do you have the “Graphics.Blit” part in line 14? Then you havent’t assigned a material. The DepthGrayScale Material isn’t for your Sphere, it’s for your Camera / for your PostProcessDepthGrayScale script, to render your depth texture.
Hi, thank you for your post. When I tried to implement your codes, I have an issue. I tried to find the real distance from the camera and the object, but when I used depth = Linear01Depth, and real_distance = depth * (far – near) + near, the value does not quite match, I am wondering if you have any suggestion on it, or if I am doing anything wrong? Thank you.
Might be needed on different platforms, but in my experience I didn’t need the following line:
void OnRenderImage (RenderTexture source, RenderTexture destination){
Graphics.Blit(source,destination,mat);
//mat is the material which contains the shader
//we are passing the destination RenderTexture to
}
SPOILER ALERT: The person who wrote this article published Manifold Gardens six years later. It’s so crazy to think about this.
Looking forward to the next big thing from Chyr!