Yesterday, I decided to revisit the topic of edge-detection again. I was reading through the devlog of Lucas Pope’s newest game, Return of the Obra Dinn, when I saw this post about the visual style of the game.
Even though the look for Obra Dinn is very different from the look I’m going for, his shader does require edge-detection. When I saw the image he shared of just the edge-detection effect, I was blown away. It was so clean, had pixel-perfect thin lines, and no artifacts.
In Pope’s technique, he uses object position and face normals to give each poly face a random color, and then draws lines separating the different color areas. Funny enough, this is very similar to the technique used by Thomas Eichhorn in his sketch shader, which was actually the initial inspiration for my shader effect.
At the time, I didn’t have a lot of experience with shader programming (I still don’t, but I had less back then), and I couldn’t figure out how to use color areas for edge detection. Eventually, I just went with comparing normal and depth values of pixels directly to draw the edges. You can read about the details of what I did here.
Anyway, I decided I would switch over to using color areas for edge-detection. It seemed to be much more accurate and also had less artifacts (further down I will explain some of the problems with my previous edge-detection shader).
In my shader, I follow Eichhorn’s method, and for each pixel, I set it’s color according to this formula:
color.r = normal.x;
color.g = normal.y;
color.b = depth;
Here are two images from my first go at using normals and depth to color poly faces, and then drawing edges between the color areas:

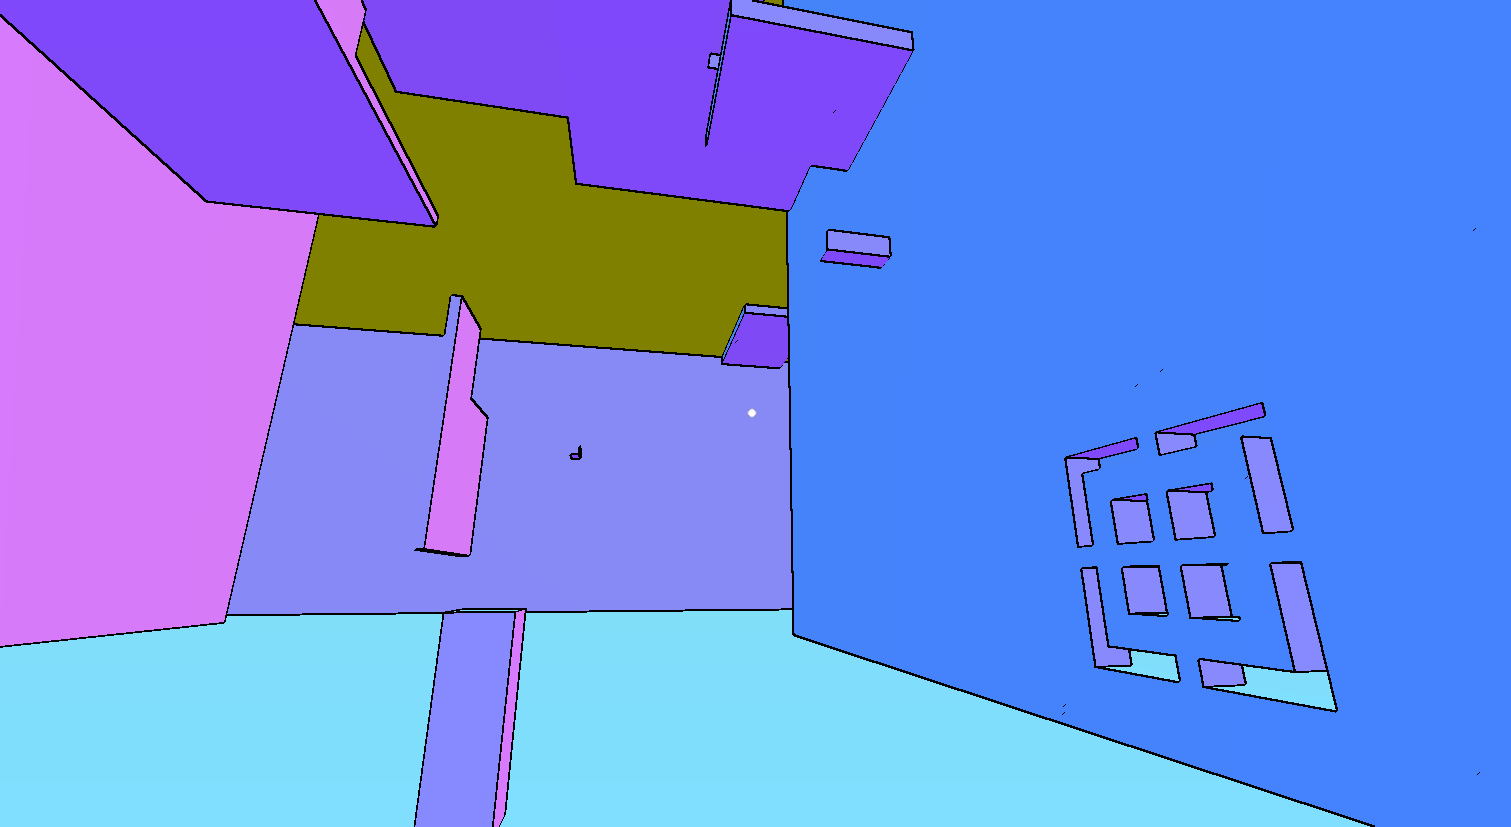
As you can see, while the shader is able to draw lines between different color areas, it is missing a ton of edges! The problem here is that there is not enough depth sensitivity, so that areas with the same normal, regardless of distance, all appear to be the same to the shader.
So, how to increase depth sensitivity? Well, one way is to lower the far clipping plane of the camera. Since depth values are spread out from 0 to 1 across the camera view distance, by lowering the far clipping plane, and therefore shortening the camera view distance, you can increase the variation in depth values.
This is what it looks like with the camera far clipping plane set to 70:
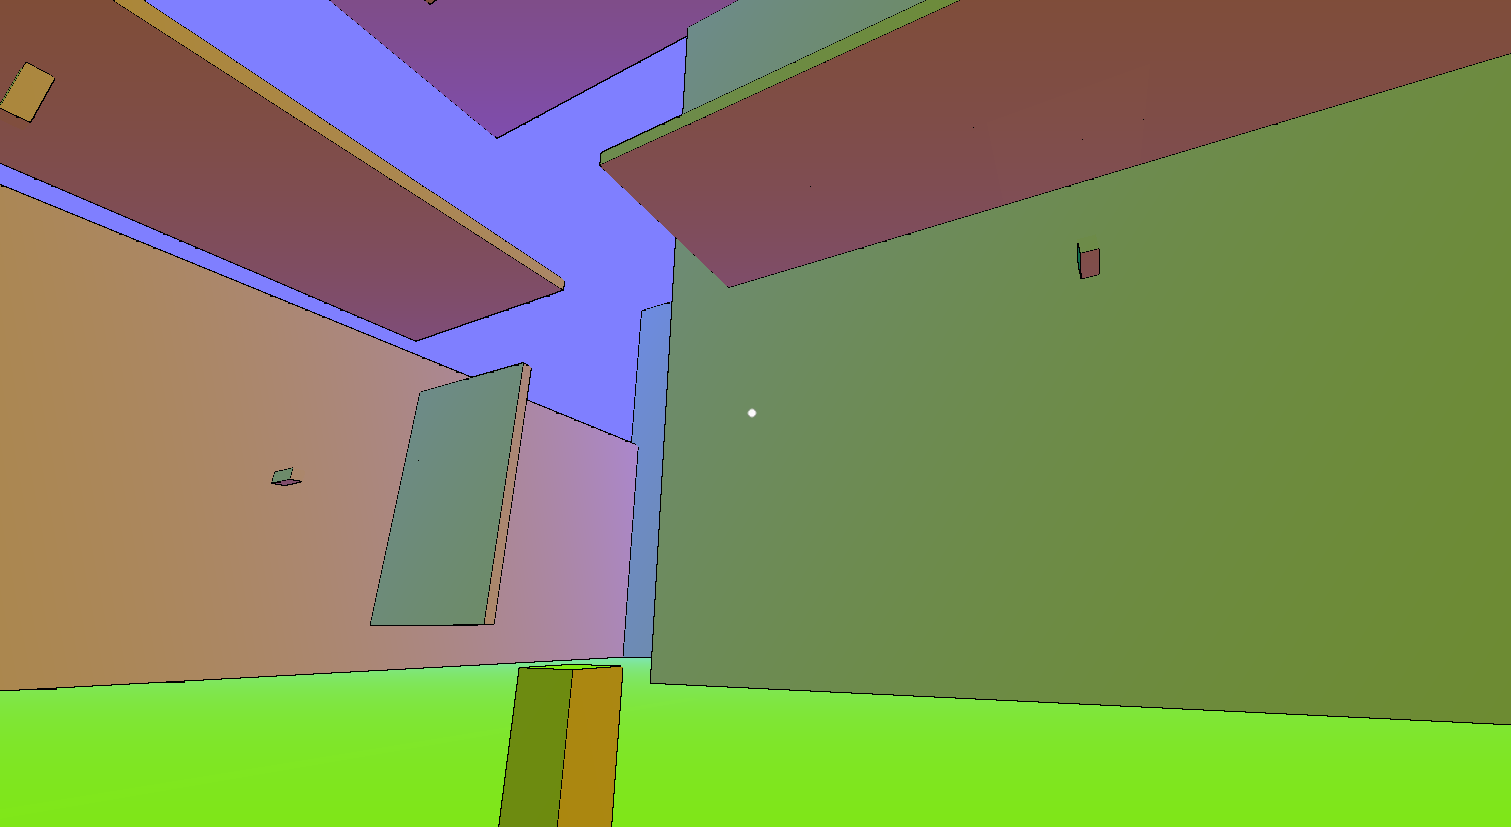
You can see there is strong variation in color, and the shader is picking up a lot more edges. Unfortunately, this is also causing a lot of clipping. Because of the size of my levels, I need the clipping plane to be at least 800.
Basically, what I needed was to have more sensitivity at the depth values closer to the camera, and less sensitivity at depth values farther away. I’m a bit embarrassed to say I couldn’t think of an equation right away (my math has been a little rusty having been out of school for some time), but Nick Udell suggested using a logarithm function (of course!  )
)
I changed the color assignment to this:
color.r = normal.x;
color.g = normal.y;
color.b = log(depth);
and noticed improvements right away (just look at all those edges!):

What’s interesting is that you still can’t see the color variation just with you eye, but for the shader, there’s enough difference to distinguish between pixels having the same normals but different depth values.
The new version of the shader is better than the one I had before, but still not perfect. It’s also still not quite the same technique that Pope is using, as he is using the world space coordinates of the objects as well (I asked him about the approach, and he goes into some detail here)
I’m still learning shaders, so haven’t quite figured out how to actually do this yet, but it appears it should happen in the vertex shader, and not the fragment shader, which is where I had been focusing on.
Below is a comparison of the shader vs the old one.
Here’s the old shader:
Here’s the new one:
Here’s a gif comparing them:
You can see that the older shader had many more thicker lines. This may not look that bad from the gif, but in the game, it looks quite cluttered and distracting.
You can also see in this close up there were a ton of artifacts in the old version:
I know that this is a problem due to using normals, and not depth values. Not exactly sure what the problem is, but I think it has something to do with floating point precision. They tend to occur at places where primitives are supposed to align. I’m guessing there’s just some tiny difference, and the shader is detecting a gap. During gameplay, these would flicker in and out all the time, which really bothered me.
In the new version, I’ve managed to improve on this:

Some of the artifacts are still there, but they’re much smaller and less noticeable.
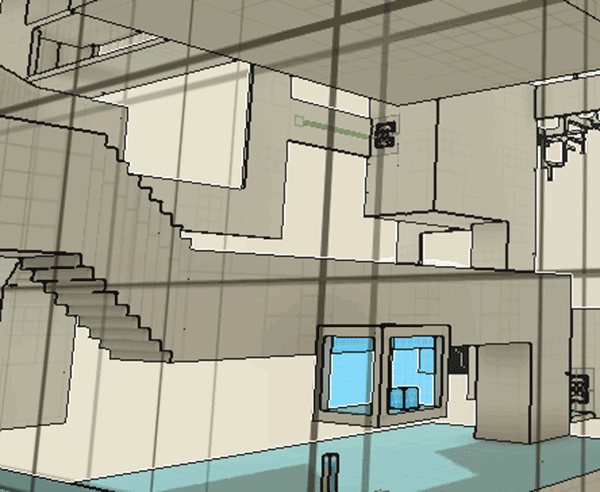
There are also some problems with the new shader. For example, it is missing the edges on the stairs, as shown below:

I’m not too sure what’s happening. I know it has something to do with depth sensitivity, but haven’t nailed it down yet.
Here’s a gif comparing a close up of the two versions:
Anyway, I’m going to leave the shader alone for now to work on other more pressing aspects of development. I’m going to try incorporating object position into the shader next time, like what Pope is doing, as this seems to be much more precise and effective.
One Comment
I’m quite a newbie in shaders, so sorry about asking such a simple question, but would you mind telling how you drew edges?
I’m tryin to write a similar shader code, but I couldn’t figure out how to draw lines. I think it requires access to neighboring pixels, but I’m not sure. A small tiny snippet would be hugely appreciated!